What is Computer Vision? Azure's Computer Vision service gives developers an access to advanced algorithms that process or analyze images and return its information based on the visual features that you need. It has different services like Optical Character Recognition (OCR), Image Analysis, Face, and Face.
In this blog, we'll be using the Image Analysis because we want to analyze and extract the objects present from images. Also, Image analysis extracts many visual features, such as faces, adult content, and auto-generated text descriptions.
Without further ado, let's start coding!
1. Machine with your text editor/IDE. (e.g. Visual Studio Code)
2. Microsoft Azure Account (Try it for free)
3. React.JS Application
1.1 Create resource in Azure Portal. (Make sure you already have subscription whether free or paid in Azure)

Below is a sample. If you don't have existing computer vision service, then you can enjoy the free tier for the pricing. Click the "Create" then once the creation is done, click the button "Go to resource"

1.2 click the "Click here to manage keys" to navigate to the key section.

1.3 Save the keys because we are going to need them on our react.js configuration.

2.1 npm i axios a promise-based HTTP Client for our application.
On my sample, I'm using the React.JS project template. For this demo, I'm overwriting the App.tsx file.
3.1 Import axios on your file.
3.2 Inside the function App(), declare your keys and endpoint.
        const key = "_YOUR_ENDPOINT_KEY";
const endpoint = "_YOUR_AZURECOMPUTERSERVICE_ENDPOINT_/vision/v3.2/analyze?";
3.3 Create a method that will analyze the image and that will call to our endpoint.
        const analyzeImage = () => {
  let data = new FormData();
  data.append("blob", image, "file.png");

  const params = new URLSearchParams({
    // "Categories,Description,Color",
    visualFeatures: "Tags",
  }).toString();

  const config = {
    headers: {
      "Content-Type": "multipart/form-data",
      "Ocp-Apim-Subscription-Key": key,
    },
  };

  axios.post(`${endpoint}${params}`, data, config).then((response) => {
    // response here
  }).catch((error) => {
    console.log(error);
  }).finally(() => {
    // do something after the request is finished
  });
};
If you will look at the params, we have other options for the visual feature that we can use like "Categories", "Description" and "Color"
Basically, our code will attach the blob image uploaded from the input file, then that blob file is what we're going to attach as FormData then call to our Azure Computer Vision endpoint.
The Ocp-Apim-Subscription-Key is where we attach the key that we declared above.
3.4 Since we're using Tags as our Visual Feature, let's map our response to a friendly result so if we view it, we'll get a readable data.
        // Format tags for display
const formatTags = (tags: any) => tags.map((tag: any) => `${tag.name} (${tag.confidence.toFixed(2) * 100}%)`).join(", ")
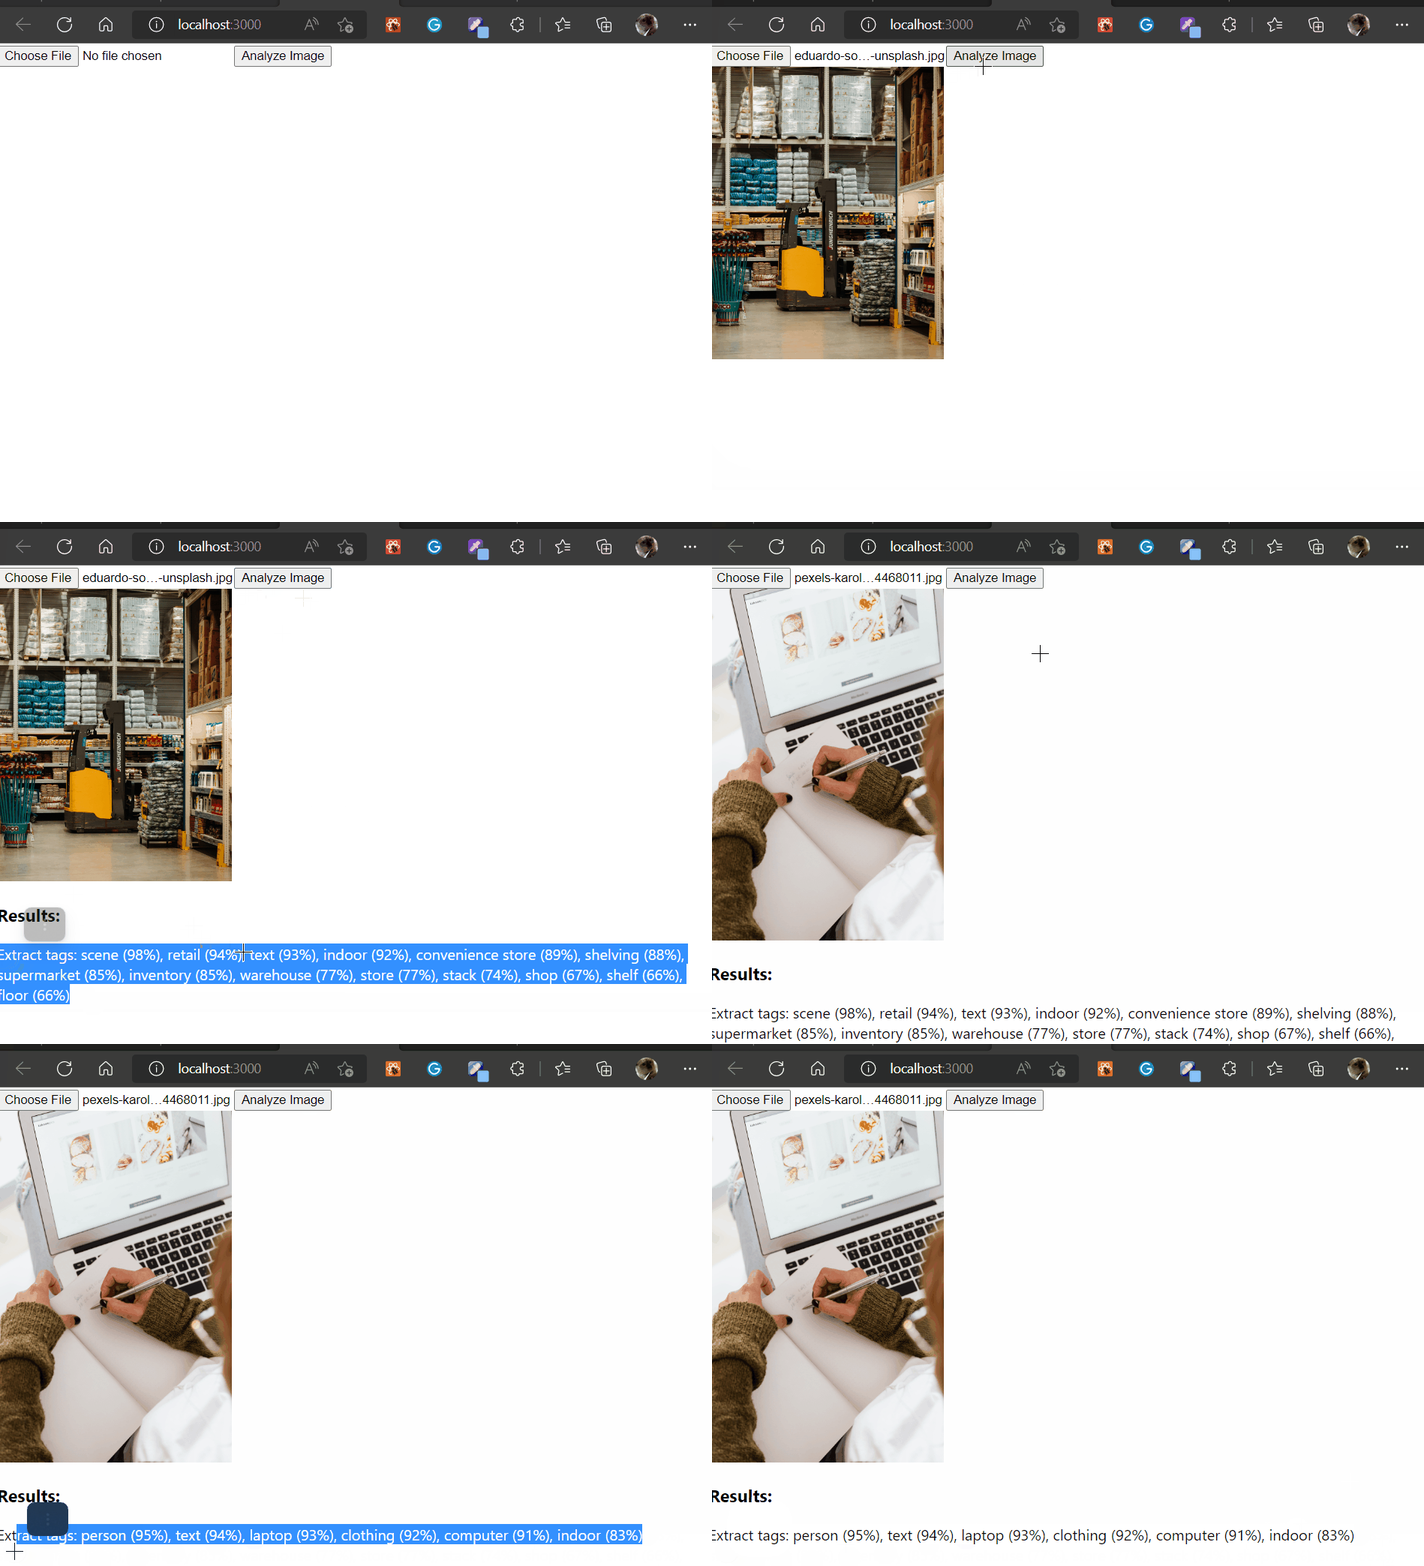
Here's the final code that you can use on your local. (Don't mind the skeleton screens)
        import { useState } from "react";
import axios from "axios";

function App() {
  const key = "_YOUR_ENDPOINT_KEY";
  const endpoint = "_YOUR_AZURECOMPUTERSERVICE_ENDPOINT_/vision/v3.2/analyze?";

  const [loading, setIsLoading] = useState(false);
  const [image, setImage] = useState<any>();
  const [result, setResult] = useState<string>();

  // Format tags for display
  const formatTags = (tags: any) => tags.map((tag: any) => `${tag.name} (${tag.confidence.toFixed(2) * 100}%)`).join(", ")

  const analyzeImage = () => {
    setIsLoading(true);
    let data = new FormData();
    data.append("blob", image, "file.png");

    const params = new URLSearchParams({
      // "Categories,Description,Color",
      visualFeatures: "Tags",
    }).toString();

    const config = {
      headers: {
        "Content-Type": "multipart/form-data",
        "Ocp-Apim-Subscription-Key": key,
      },
    };
    axios.post(`${endpoint}${params}`, data, config).then((response) => {
        setResult(`Extract tags: ${formatTags(response.data.tags)}`);
      }).catch((error) => {
          console.log(error);
      }).finally(() => {
        setIsLoading(false);
      });
  };

  const handleChangeImage = (e: any) => { if (e.target.files && e.target.files.length > 0) setImage(e.target.files[0]);}

  return (
    <>
      <input type="file" accept="image/*" onChange={(e) => handleChangeImage(e)} />
      {loading ? ( "Analyzing...") : (<button onClick={analyzeImage}>Analyze Image</button>)}
      <br />
      {image ? (<img src={URL.createObjectURL(image)} alt="preview" width={250} />) : null}
      {result ? (<><h3>Results:</h3><p>{result}</p></>) : null}
    </>
  );
}

export default App;

Depending on the image size that you upload, it will take a few seconds to analyze.
You can read more about the Computer Vision from official Microsoft Learn
That's it! I hope you enjoy this blog. Have a wonderful day!